Floral Henna Designs: 25 Templates + Beginner Tutorial
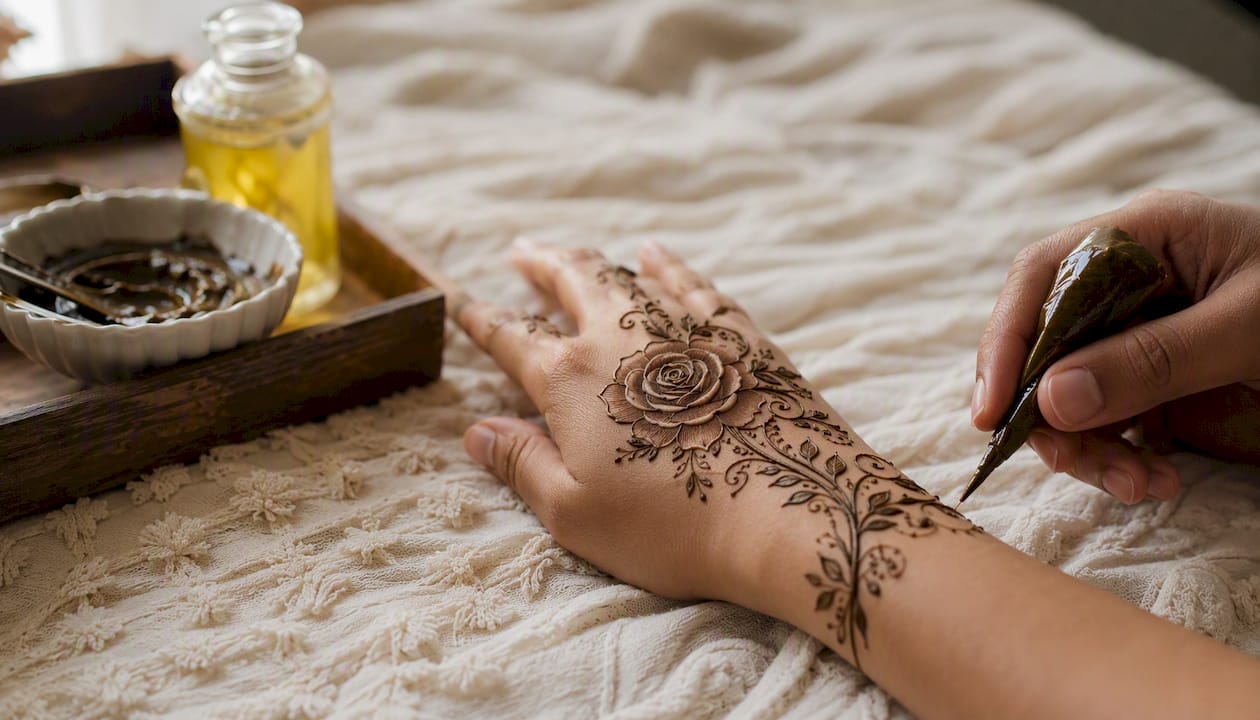
Floral henna designs are hand-painted botanical motifs applied to skin using natural henna paste as temporary body art. Start right now with three moves: draw one tight spiral for a rose center, add two curved leaves on either side, then seal the paste with a sugar-lemon mix and leave it for at least two hours.
Step 1: Draw a small clockwise spiral (about the size of a dime) on the back of your hand.
Step 2: Add two teardrop leaves flanking the spiral, then connect them with a short curved vine.
Step 3: Seal with sugar-lemon solution, let dry completely, and avoid water for 12 hours.
Pro Tip: Hold the cone at a 45-degree angle and rest your pinky on the skin for stability. Before touching your hand, practice five spirals on paper to warm up your grip.
Key Takeaways
Floral henna designs are most successful when you start with one clean motif, build outward with leaves and vines, and give the paste maximum time to develop before removing it.
Point | Details |
Start with one rose | Master a single tight spiral and five petals before adding vines or filler motifs. |
Match style to occasion | Minimal for everyday, medium Arabic for parties, dense South Asian for bridal. |
Aftercare drives stain depth | Leave paste on 6–8 hours minimum, seal with sugar-lemon, and avoid water for 12 hours. |
Practice in 4 sessions | Spirals, petals, vines, then a timed full design — short focused sessions build skill faster than occasional long ones. |
Hennaforfun for guided learning | Private lessons, Whenna Events, and DIY kits available across the greater Seattle area. |
Table of Contents
What do floral henna designs actually look like?
The visual vocabulary of flower henna designs is wider than most beginners expect. Rose clusters, lotus blooms, trailing vines, and tiny filler flowers are the most popular starting points, and each one photographs differently depending on scale, line weight, and how much skin you leave bare.
Here are the motifs worth knowing, with their cultural meanings:
Rose clusters: Love and beauty; the go-to for wedding henna designs and anniversary celebrations.
Lotus: Purity and new beginnings; common in South Asian bridal mehndi and maternity designs.
Vines and tendrils: Growth and prosperity; used as connective tissue between larger motifs.
Tiny filler flowers: Depth and texture; placed in negative space to frame a central bloom.
Mandala-centered blossom: Symmetry and spiritual focus; popular for palm-center placements.
Single wrist bloom: Minimalist elegance; ideal for everyday wear and office-friendly looks.
Fingertip florals: Delicate and photogenic; trending for social media close-ups.
White henna look: A modern, fashion-forward style using white body paint paste for events and festivals.
Floral designs photograph best when you preserve negative space around the main motif. A rose with bare skin framing it reads sharper in photos than one surrounded by dense fill. The contrast is what the camera catches.
Styling note: mandala-centered blooms and rose clusters photograph best because their radial symmetry creates strong focal points. Fingertip florals work especially well in close-up shots where fine detail is visible. For event photography, treating your henna as part of the visual plan — matching intricacy to the event theme — produces the most cohesive images.
Which style and placement work best for your occasion?
Four style families cover most of what you’ll see in flower mehndi designs, and each suits a different occasion and hand shape.
Style | Line Weight | Coverage | Best For |
Arabic | Bold, flowing | Medium | Eid, casual parties, quick application |
South Asian (Indian/Pakistani) | Fine, dense | Full hand to forearm | Bridal, deep cultural ceremonies |
Minimal/Modern | Sparse, tattoo-influenced | Low | Everyday, office, social media |
Fusion | Mixed | Variable | Cross-cultural weddings, creative events |
Contemporary henna trends show a clear move toward fusion and minimal looks, blending traditional South Asian florals with Western fine-line tattoo aesthetics. Arabic style remains the fastest to apply and the most forgiving for beginners.
Placement options and when each works:
Palm center: Mandala or lotus; powerful focal point for bridal and maternity photos.
Backhand cascade: Rose clusters flowing from wrist to fingers; classic bridal henna floral look.
Fingertip accents: Single petals or tiny blooms; quick, modern, great for parties.
Wrist band: Vine or repeating flower border; works for everyday wear without heavy coverage.
Forearm trail: Extended vine with scattered blooms; dramatic for festivals and photoshoots.
Pro Tip: Match motif scale to the event. A single wrist bloom takes a short time to apply and suits a work day. A full backhand cascade takes 45–60 minutes and belongs at a wedding or Eid celebration.
How do you draw a simple floral motif step by step?
You can draw a lovely rose-based floral motif in 12–15 minutes using a cone and three simple steps. Starting with the flower center and layering outward is the technique professionals use — it keeps proportions controlled and makes corrections easy.
Prepare your cone. Snip a tiny opening (1–2 mm). Test pressure on paper until the line is hair-thin and consistent.
Draw the spiral center. Start at the middle and coil outward two to three times, keeping even spacing between rings.
Add petals. Draw five to seven curved “C” shapes around the spiral, each touching the outer ring. Vary petal size slightly for a natural look.
Add leaves. Place two or three pointed teardrop shapes beside the rose, with a thin center vein drawn through each.
Connect with a vine. Draw a gently curving line from the base of the rose outward, letting it branch once or twice.
Add shading and dots. Fill one side of each petal with short parallel lines (hatching) for depth. Place small dots in the negative space between motifs.
Dos:
Keep consistent pressure throughout — uneven pressure is the number one cause of broken lines.
Leave negative space. Crowding motifs together flattens the design.
Work from the center outward so your hand doesn’t smear wet paste.
Don’ts:
Never use black henna. Products labeled “black henna” typically contain PPD (para-phenylenediamine), which can cause severe skin reactions.
Don’t rush the spiral. A wobbly center throws off every petal around it.
Avoid touching wet paste with your palm or fingers.
Pro Tip: Before drawing on skin, run five warm-up spirals on paper. Then do two on the back of your non-dominant hand. Your line quality in the first 60 seconds of a session is always shakier than after a brief warm-up.
What materials do you need for floral henna at home?
Essential materials:
Henna cone: Pre-filled, ready-to-use cones are the easiest starting point. The Hennaforfun Handmade Henna Cones use fresh natural paste and come with a fine tip suited for detailed floral work.
Fresh henna paste: Natural henna paste should smell earthy and slightly herbal. Avoid anything with a chemical or synthetic smell.
Sugar-lemon sealer: Mix equal parts lemon juice and sugar, brush lightly over dried paste to extend stain time.
Fine-tip applicator bottles (optional): Useful for refilling cones or controlling flow on large designs.
Stencils: Speed up consistent motifs for beginners. Hennaforfun’s DIY Henna Stencils are a practical shortcut while you build freehand confidence.
For a complete beginner setup, the Hennaforfun DIY Henna Kit bundles cones, sealer, and instructions in one package — useful for home practice or gifting.
Safety checklist before you apply:
Always do a patch test 24 hours before full application. Apply a small amount to your inner wrist and check for redness or irritation.
Read the ingredient list. Natural henna contains lawsone (2-hydroxy-1,4-naphthoquinone) and nothing else unusual. Reject any product listing PPD, silver nitrate, or synthetic dyes.
Check paste freshness. Henna paste older than a few weeks loses staining power. Store unused paste in the freezer.
Keep henna away from eyes and broken skin.
How long does the stain take to develop?
Time After Application | What Happens | What to Do |
at least two hours | Paste is wet; design is fragile | Keep hand still; apply sugar-lemon sealer |
2–6 hours | Paste begins to dry and crack | Avoid water; keep hand warm |
6–12 hours | Paste fully dry; initial orange stain visible | Gently scrape off paste; do not wash |
24–72 hours | Stain darkens significantly | Rub with coconut or olive oil; avoid soap on the area |
up to two weeks | Peak color (deep brown to near-black) | Minimize water exposure; moisturize daily |
2+ weeks | Gradual fading as skin exfoliates | Enjoy the fade or reapply |
Typical peak color appears within 24–72 hours and can last up to two weeks depending on skin type, placement, and aftercare.
Aftercare do’s and don’ts:
Keep the paste on as long as possible — overnight is ideal.
After scraping, rub the area with coconut oil before any water contact.
Avoid swimming, long showers, and exfoliating scrubs during the first week.
Palms stain darkest because the skin is thicker; fingertips and wrists fade faster.
Pro Tip: Wrap your hand loosely in medical tape or a cloth overnight to trap body heat. Warmth accelerates the dye oxidation process, and designs left on for 8+ hours with heat consistently produce deeper color than those removed after 2–3 hours.
For broader beauty aftercare tips that complement henna care, including skin hydration routines, that resource is worth a look.
Six ready-to-copy floral templates for every occasion
These template recipes give you a motif order, scale, and spacing guide you can follow yourself or hand directly to an artist.
1. Bridal rose cascade (full backhand) Start with a large rose cluster at the wrist, cascade three smaller roses toward the middle finger, and fill gaps with tiny filler flowers and leaf bridges. Leave the outer edges of the hand bare for contrast. Scale: large central rose (quarter-sized), smaller satellites (dime-sized).
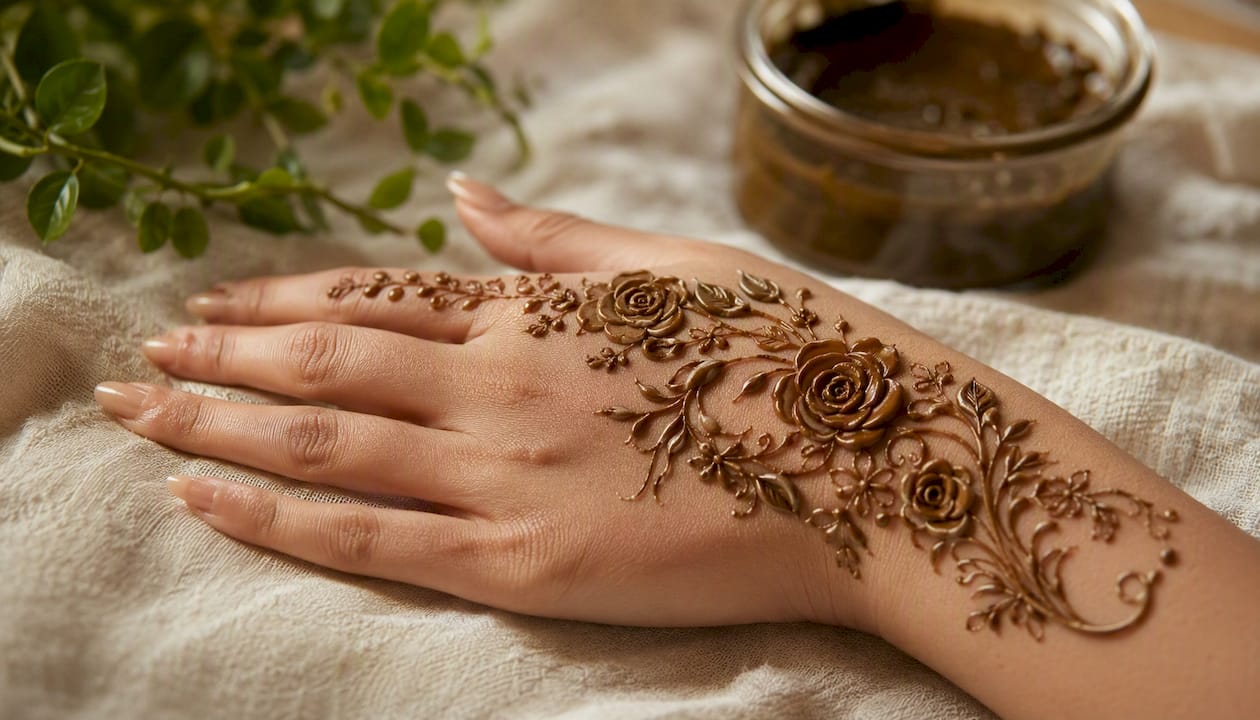
2. Single wrist bloom (maternity or everyday) One medium lotus or rose centered on the inner wrist, flanked by two leaves and a short vine curling toward the thumb. Minimal fill. Takes 10–15 minutes. Pairs beautifully with pregnancy henna photography where the belly and hands are both in frame.
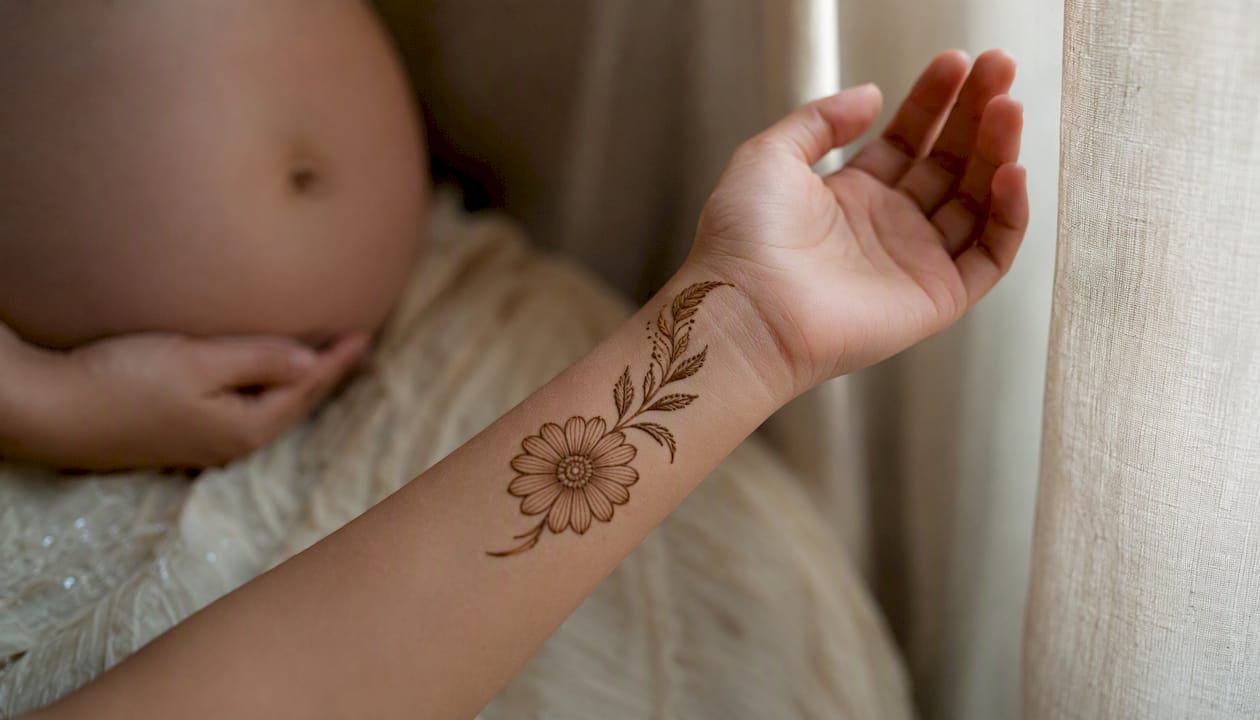
3. Fingertip flower set (casual events) One small five-petal flower on each fingertip, connected by a thin vine running along the finger edge. No palm coverage. Quick to apply, suitable for short session times and highly photogenic.
4. Minimal ring flower (office-friendly) A single small bloom centered on the ring finger’s middle segment, with two tiny leaves. Looks like a floral ring. Subtle enough for professional settings.
5. Eid vine trail (forearm) A continuous vine starting at the wrist and trailing 4–6 inches up the forearm, with alternating rose buds and leaf clusters spaced every inch. Bold but not dense.
6. Full bridal mehndi (palm and backhand) A mandala centered on the palm, rose clusters on the backhand, fingertip accents, and a wrist band connecting both sides. This is the most time-intensive template — plan for 60–90 minutes of application.
How do you build real skill with a 4-session practice plan?
Consistent short sessions beat occasional long ones. Here are the drills that build the specific muscle memory floral henna requires:
Spirals: 10 per session, varying size from dime to quarter. This is the foundation of every rose center.
Petal “C” curves: 20 per session, alternating direction. Focus on smooth arcs without lifting the cone.
Leaf veins: Draw a teardrop, then bisect it with one clean center line. Repeat 15 times.
Thin-to-thick lines: Start with light pressure, gradually increase mid-stroke, then ease off. Builds pressure control.
Dot rows: Evenly spaced dots in a straight line, then a curved line. Dots reveal pressure consistency instantly.
4-session progression plan:
Session 1 (30 min): Cone handling and spirals. Fill a full sheet of paper with spirals of varying sizes. Goal: no broken lines.
Session 2 (30 min): Petals and shading. Draw 10 complete roses on paper. Add hatching to one side of each petal.
Session 3 (30 min): Vines and composition. Connect three roses with vines and leaves on paper, then repeat once on your non-dominant hand.
Session 4 (45 min): Full timed run-through. Draw a complete wrist-to-finger design on your hand, aiming to finish in under 30 minutes.
Pro Tip: Photograph your practice sheet after every session and compare the silhouettes side by side. Improvement in spiral roundness and petal symmetry is often invisible in the moment but obvious when you line up four photos in a row.
Learn from a pro: Hennaforfun lessons, workshops, and kits
Hennaforfun, based in the Kirkland, Bellevue, and Snohomish area of Washington State, offers several routes into floral henna depending on how you learn best.
Private henna lessons: One-on-one instruction with Angana, covering cone handling, motif building, and composition. Available in-person across the greater Seattle area.
Group workshops and Whenna Events: Interactive sessions hosted at wineries, homes, and corporate venues. Participants leave with a completed design and basic technique they can practice at home.
Pregnancy henna services: Personalized maternity designs for photoshoots and baby showers, with motifs chosen to celebrate the occasion.
DIY kits and handmade cones: Available through the Hennaforfun shop for home practice or gifting. Cones use fresh natural paste.
Upcoming events: Check the Hennaforfun event calendar for scheduled Whenna Events and open workshops near you.
When booking a lesson or workshop, ask about: session duration, maximum group size, whether the artist travels to your venue, and the allergy and patch-test policy. Any reputable henna artist will welcome those questions.
How long does application take, and what does it cost?
Simple floral motifs — such as a single wrist bloom or fingertip set — take a short time to apply. A medium backhand design with roses and vines runs 30–45 minutes. Full bridal mehndi covering both hands and forearms typically requires an extended application time when done by a professional.
DIY costs are low once you have supplies. A quality handmade cone costs a few dollars, and a full DIY kit typically runs $20–$40 depending on what’s included. The main investment is practice time, not materials.
Hiring a professional varies widely by region, design complexity, and event type. Simple party henna at an event often runs hundreds of dollars per hour for an artist’s time. Bridal full-hand mehndi can cost several hundred dollars depending on the artist’s experience and the intricacy requested. For events in the Seattle and Snohomish area, Hennaforfun’s Whenna Events page lists current service options and booking details.
The real cost difference between DIY and hiring a pro isn’t just money. A professional brings consistent line quality, fresh paste, and design knowledge that takes months to build on your own.
Beginner mistakes that slow your progress (and how to fix them)
The most common beginner errors in floral henna are fixable once you know what to look for.
Cutting the cone tip too wide. A large opening means fat, uncontrollable lines. Snip 1 mm at a time and test on paper before touching skin.
Skipping the warm-up. Cold hands and a cold cone both affect flow. Warm your hands and run a few test lines before starting.
Overloading negative space. Beginners often fill every gap with dots or tiny flowers, which flattens the design. Resist the urge. Empty space is part of the composition.
Inconsistent pressure mid-stroke. Lines that start thin and balloon in the middle come from grip tension. Practice the thin-to-thick drill from the progression plan until pressure feels automatic.
Rushing the paste removal. Scraping paste off after 90 minutes instead of 6–8 hours cuts stain depth significantly. Patience here has a direct payoff in color.
Copying complex designs before mastering basics. Intricate floral mehndi looks achievable in photos but requires hundreds of hours of practice. Start with a single rose, get it clean, then add one element at a time.
Why quiet-luxury florals are the most interesting thing happening in henna right now
The dominant trend in henna right now isn’t maximalism. It’s restraint. Artists are stripping back dense coverage and letting one or two well-placed motifs carry the whole design — a single large rose on the wrist, a lotus on the palm with nothing else around it.
This shift toward “quiet luxury” florals, documented in recent trend coverage, is partly aesthetic and partly practical. Minimal designs photograph better on social media, take less time to apply, and age more gracefully as they fade. A dense full-hand design looks stunning the day of a wedding and patchy by day five. A single clean rose still looks intentional at day ten.
The fusion angle is equally interesting. Western fine-line tattoo aesthetics — thin outlines, no fill, geometric spacing — are being layered onto traditional South Asian motifs to create designs that feel both rooted and contemporary. A lotus drawn with tattoo-style precision reads differently than the same lotus rendered in traditional thick-outline mehndi. Neither is better. They serve different moments.
My advice: if you’re choosing a design for an event, think about the photos first. Align the intricacy and motif choice with your outfit and jewelry. A heavily embroidered lehenga calls for bold, dense coverage. A simple silk dress pairs better with a single wrist bloom. Scale and contrast matter more than how many motifs you can fit on your hand.
Guided help is closer than you think
Hennaforfun offers private lessons, group workshops, and ready-to-use kits for anyone who wants to move faster than solo practice allows. Private lessons with Angana cover everything from cone handling to full floral compositions, in person across Kirkland, Bellevue, and Snohomish. For events, the Whenna Events service brings a professional artist to your venue — winery, home, or corporate space.
For home practice, the DIY Henna Kit includes fresh handmade cones and everything you need to start the same day. All products use natural paste with no PPD or synthetic additives. To book a private lesson or check upcoming workshop dates, visit Hennaforfun and reach out directly for group pricing and availability.
Sources
Recommended
Comments