Top 12 Arabic Henna Designs: Saveable Gallery + 5 Easy Tutorials
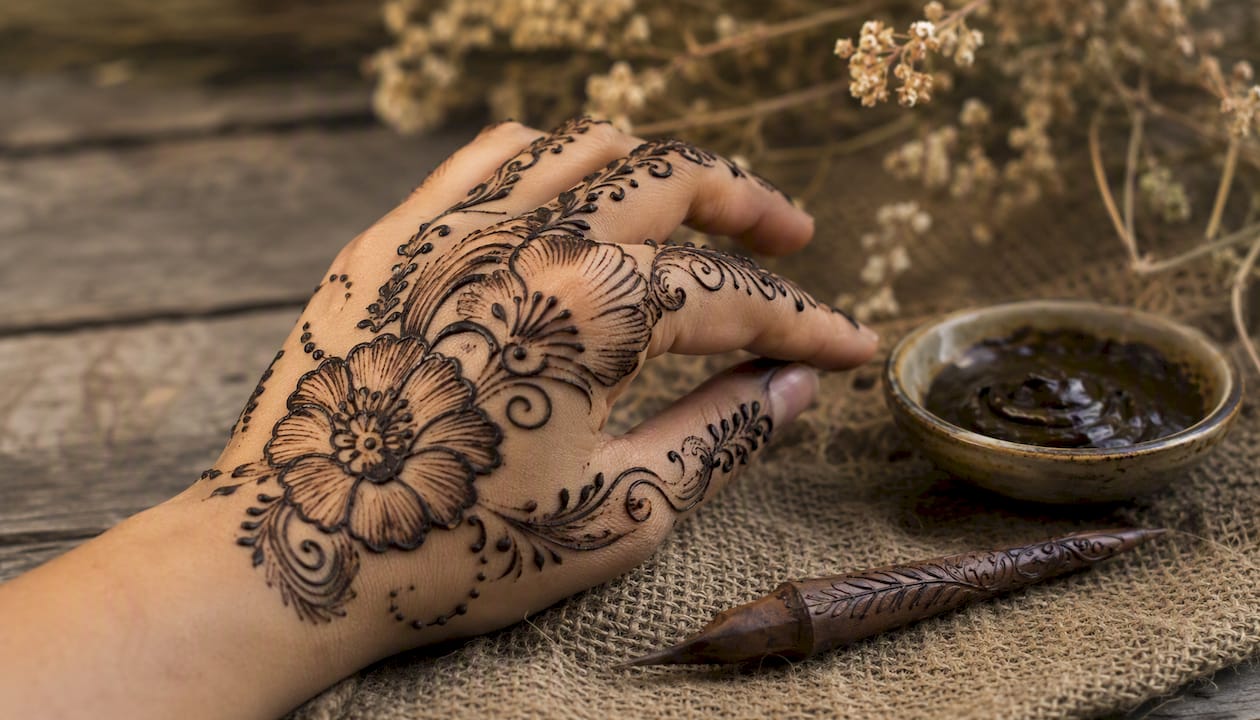
This gallery covers the most useful arabic henna designs to save and copy, from bold Khaleeji florals to minimalist finger chains, plus five quick step-by-step motifs and U.S.-focused safety and aftercare. Whether you’re prepping for a wedding, a baby shower, or just want to try something new on a Saturday afternoon, you’ll find a style here that fits your skill level and occasion.
What you’ll get on this page:
12 named style categories with example descriptions and copyable motifs
A materials checklist and five short DIY tutorials
An aftercare timeline for a darker, longer-lasting stain
Safety guidance on natural henna vs. black henna and PPD risks
A patch-test protocol and a decision guide for DIY vs. hiring a pro
Quick reminders before you start: Always patch-test a new henna product at least 24 hours before full application. Check the aftercare timeline in Section 5 before you begin so you know how long to plan for.
Key Takeaways
Arabic henna designs range from beginner-friendly finger accents to advanced full-hand bridal coverage, and the right choice depends on your occasion, time, and skill level.
Point | Details |
Match design to occasion | Bridal events call for full-hand coverage; casual parties work well with a wrist cuff or finger chain. |
Patch-test every new product | Apply a small amount to your inner forearm 24–48 hours before full application to check for reactions. |
Aftercare drives stain depth | Leave paste on 4–8 hours, seal with lemon-sugar, and avoid water for the first 24 hours after removal. |
Avoid black henna | Natural henna is green-brown, never black. PPD-containing products can cause blistering and scarring. |
Hennaforfun for lessons and events | Private lessons, event bookings, and DIY kits are available through Hennaforfun for hands-on guidance. |
Table of Contents
What style of Arabic henna design fits you?
Arabic mehndi patterns share a few defining traits that set them apart from Indian or Pakistani styles: free-flowing lines, bold outlines, large floral elements, and deliberate negative space. That open spacing is actually what makes them beginner-friendly. You’re not filling every inch of skin; you’re placing statement motifs with breathing room between them.
The styles below range from full bridal coverage to a single finger ring. Here’s a quick orientation:
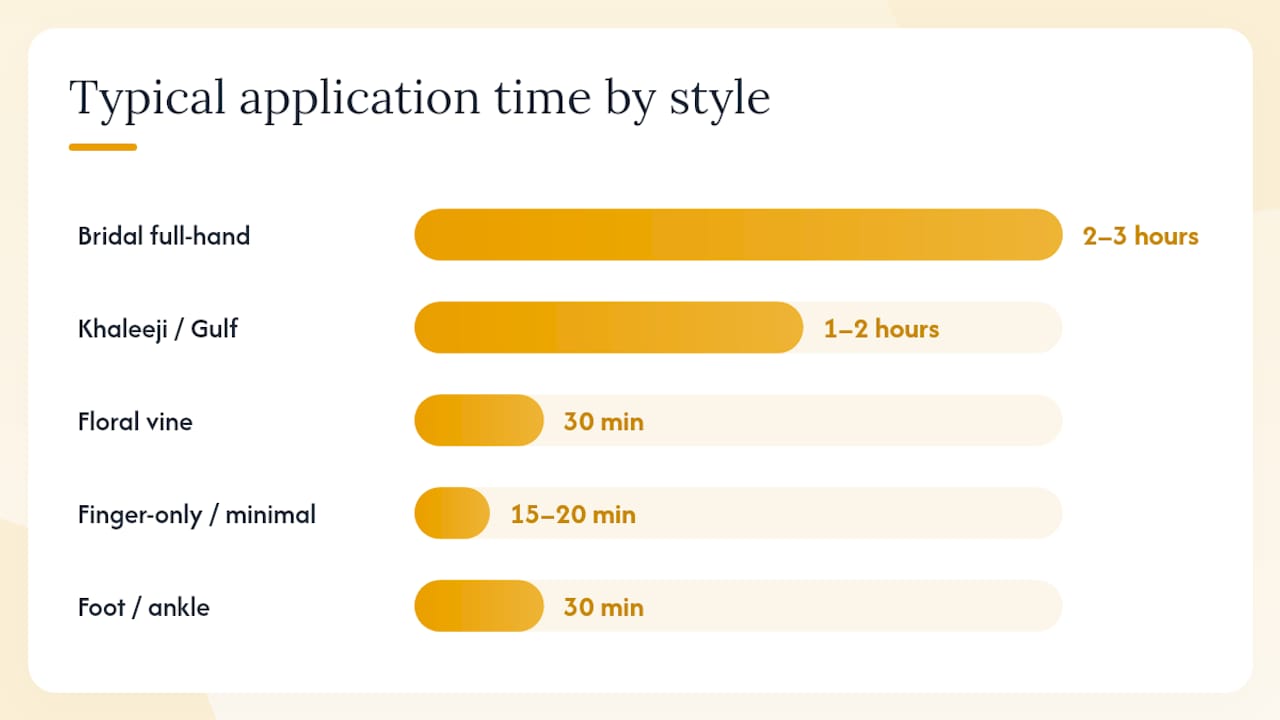
Style | Coverage | Skill Level | Typical Time |
Bridal full-hand | Wrist to fingertips | Advanced | 2–3 hours |
Khaleeji/Gulf | Back of hand, open florals | Intermediate | |
Floral vine | One side of hand or arm | Beginner–Intermediate | 30 min |
Finger-only/minimal | Fingers and knuckles | Beginner | 15–20 min |
Mandala centerpiece | Palm or back of hand | Intermediate | — |
Foot/ankle | Top of foot, ankle wrap | Intermediate | 30 min |
Contemporary/abstract | Geometric, mixed media | Intermediate–Advanced | — |
Pro Tip: Before saving a design image for reference, zoom in on the outline weight. Thick, confident outlines are the hallmark of authentic Arabic work. If the lines look thin and scratchy in the photo, the finished stain will likely look the same on skin.
The sections below walk through each style with example descriptions, motif notes, and photography tips for building your own reference folder.
Curated gallery: example designs by style
Browsing hundreds of pinned Arabic henna examples online is useful for volume, but it can get overwhelming fast. The gallery below is organized by style so you can zero in on what you actually need. Each entry includes a short description, the key motifs to copy, and a note on where the design works best.
1. Bridal full-hand Arabic designs
What it looks like: Dense coverage from wrist to fingertip, with layered florals, curved vines, and teardrop paisleys filling the back of the hand. The palm often carries a large central motif, a rose or mandala, surrounded by trailing leaves.
Key motifs to copy:
Oversized roses with petal shading
Curved vine trails connecting finger tips to wrist
Teardrop paisleys stacked along the thumb edge
Where it works best: Weddings, Eid celebrations, bridal showers. Save high-resolution images from curated Arabic henna boards for line-weight reference before attempting this style.
Photography tip: Photograph against a neutral background in natural light. Spread fingers slightly apart so the negative space between motifs reads clearly.
2. Khaleeji/Gulf henna designs
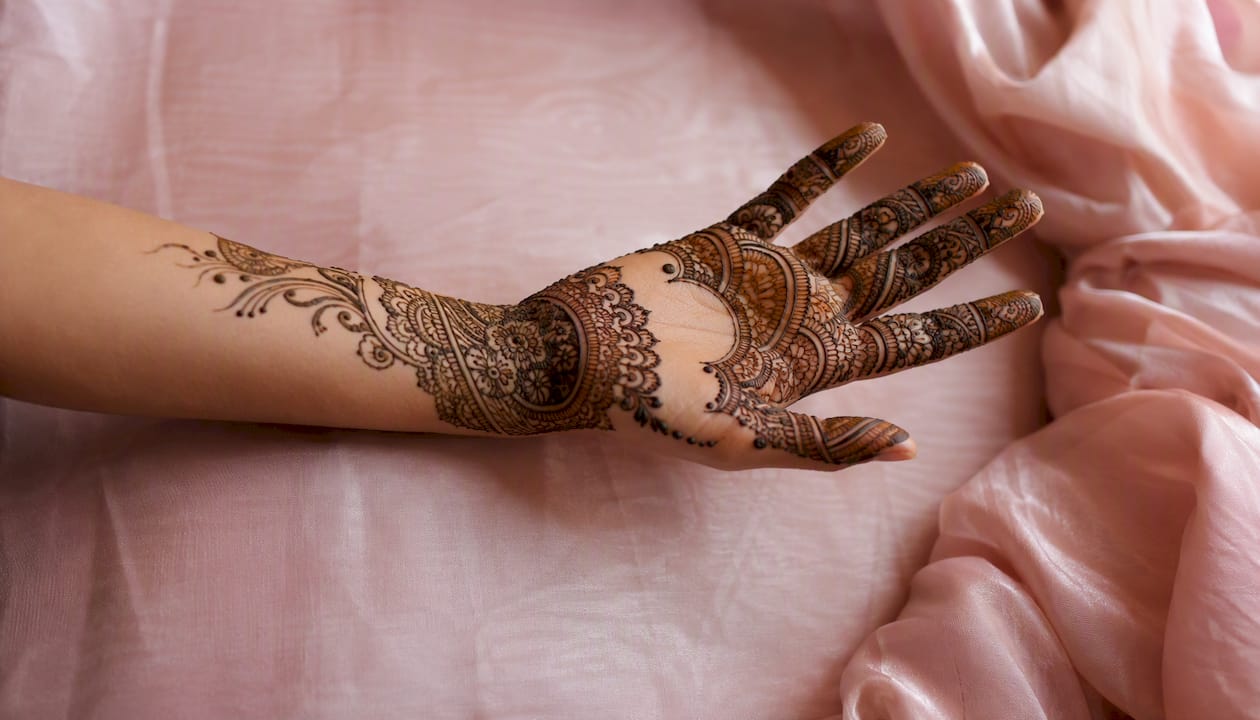
Khaleeji henna comes from the Gulf region and is defined by large open florals, teardrop paisleys, and bold negative space. A full Khaleeji bridal hand typically takes around one to two hours; the minimalist khafif variant requires only a short session suitable for a quick application.
Key motifs to copy:
Single large bloom centered on the back of the hand
Wide, open petals with minimal interior shading
Scattered dots and short curved lines as filler
Where it works best: Festive events, Gulf-style weddings, Eid. The open spacing makes it one of the most photogenic styles for social media.
3. Floral vine designs
A single vine running diagonally from the wrist toward the middle finger, with roses, leaves, and small buds branching off. Bold Arabic floral styles rely on a mapped main vine before any detail work begins.
Key motifs to copy:
S-curve vine as the spine of the design
Alternating roses and leaf clusters along the vine
Small dot accents at branch tips
Where it works best: Parties, festivals, casual events. A good intermediate stepping stone before attempting full-hand coverage.
4. Finger-only and minimal designs
Just the fingers: ring chains, knuckle dots, single petal cuffs at the base of each finger. Simple Arabic mehndi uses bold strokes and flowing patterns with less dense spacing than Indian styles, which makes finger-only work genuinely achievable for beginners.
Key motifs to copy:
Thin vine wrapping around one finger like a ring
Stacked chevron lines across knuckles
Single teardrop at the fingertip
Where it works best: Everyday wear, casual gatherings, first-time DIY practice. Takes 15–20 minutes and requires minimal materials.
5. Mandala centerpiece designs
A large circular mandala anchored in the center of the palm or back of the hand, with radiating petals and geometric lines. The symmetry demands steady hands but the repetitive structure actually makes it easier to plan than freeform florals.
Key motifs to copy:
Central dot with concentric petal rings
Alternating filled and open petals
Short radial lines extending to the wrist
Where it works best: Yoga events, spiritual celebrations, maternity shoots. Pairs well with Hennaforfun’s pregnancy henna services for belly art.
6. Foot and ankle designs
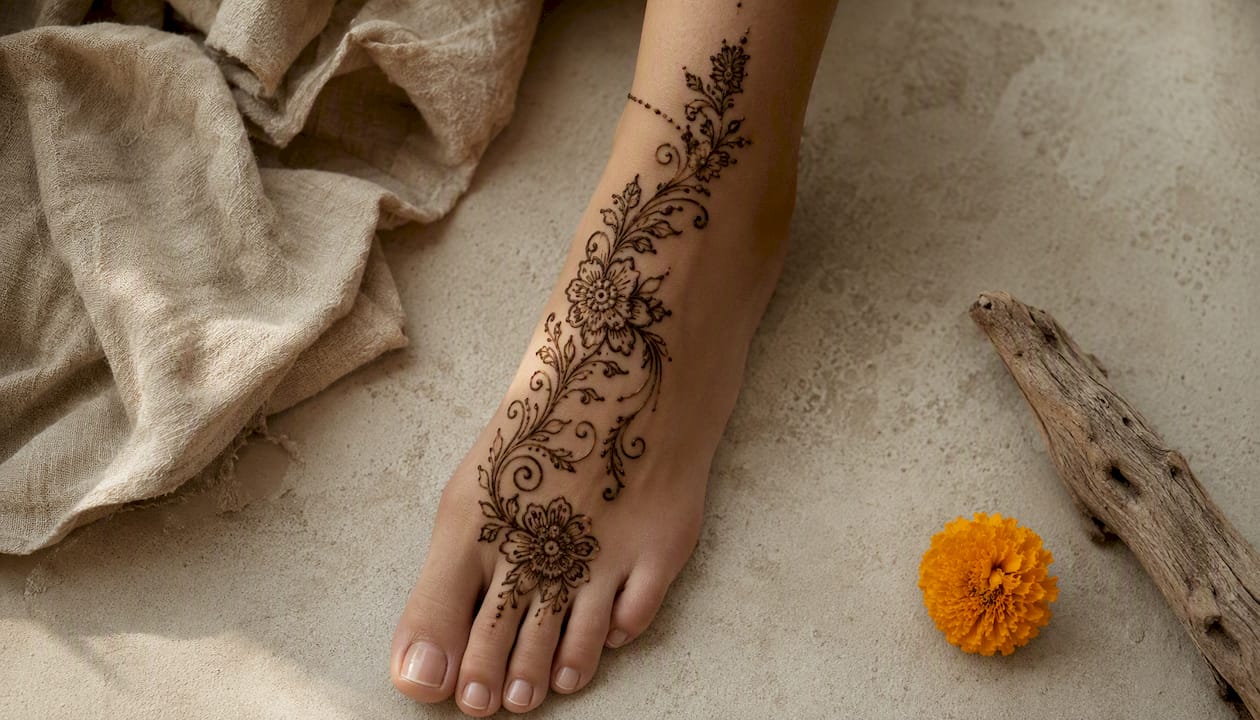
The top of the foot and ankle wrap are underused canvases. A diagonal vine from the ankle bone to the second toe, with a floral cluster at the ankle, reads beautifully in sandals.
Key motifs to copy:
Ankle cuff with teardrop drops hanging downward
Single vine running along the top of the foot
Small rose or paisley at the base of the big toe
Where it works best: Beach weddings, summer festivals, bridal parties where the feet will be visible.
Photography tip: Photograph foot designs from directly above with the foot flat. Avoid angled shots that distort the vine proportions.
7. Contemporary and geometric Arabic designs
Modern interpretations mix traditional Arabic florals with geometric shapes: triangles, chevrons, and negative-space grids. Regional style variations like Moroccan fusion blend geometric borders with classic Arabic vines for a hybrid look.
Key motifs to copy:
Diamond grid on the back of the hand with floral fills
Chevron border along the wrist with vine trailing inward
Negative-space triangles framing a central rose
Where it works best: Corporate events, modern bridal parties, anyone who finds traditional florals too ornate.
8. Indo-Arabic fusion designs
A blend of Indian mehndi’s density with Arabic open spacing. You get more coverage than pure Arabic but without the full-fill intensity of traditional Indian bridal work. Useful for occasions that call for something between casual and formal.
Key motifs to copy:
Dense floral clusters on the palm with open vine work on the back
Paisley chains along the fingers with Arabic-style leaf accents
Wrist band of repeating motifs connecting both sides
Where it works best: South Asian weddings where the bride wants a lighter look, or multicultural events.
9. Wrist cuff and bracelet designs
A single band of repeating motifs circling the wrist, like a bracelet. Simple enough for beginners, striking enough to photograph well. The repetitive structure means you only need to master one motif and repeat it.
Key motifs to copy:
Alternating paisley and dot band
Continuous vine loop with small leaf pairs
Geometric chevron band with dot filler
Where it works best: Parties, casual events, anyone who wants henna without committing to a full-hand design.
10. Half-hand designs (back of hand only)
Coverage stops at the wrist, with motifs filling the back of the hand and fingers but leaving the palm bare. Faster to apply than full coverage and easier to maintain during daily activities.
Key motifs to copy:
Large central rose on the back of the hand with vine trails to each finger
Open paisley cluster near the wrist tapering to finger accents
Diagonal floral band from pinky to index finger
Where it works best: Festivals, Eid, casual weddings where full bridal coverage isn’t needed.
11. Arm sleeve designs
A continuous design running from the wrist to the elbow or beyond. Usually structured around a central vine with branching florals. Takes longer but creates a dramatic effect for photoshoots and performances.
Key motifs to copy:
Spiral vine from wrist to elbow with alternating roses and leaves
Geometric border at the wrist transitioning to organic florals above
Negative-space bands breaking the design into visual sections
Where it works best: Photoshoots, performances, bridal parties where the arms will be bare.
12. Pregnancy belly henna designs
Circular or mandala-based designs centered on the belly, often incorporating vines, flowers, and symbolic motifs. The curved surface requires a slightly different application technique than flat hand work.
Key motifs to copy:
Large mandala centered on the navel
Radiating vine trails curving with the belly’s contour
Floral clusters at the sides framing the central motif
Where it works best: Maternity photoshoots, baby showers, pregnancy celebrations. Hennaforfun’s pregnancy henna sessions are specifically designed for this use case.
Pro Tip: For belly designs, photograph from directly in front with even lighting on both sides. Side lighting creates shadows that obscure the motif detail.
Five short tutorials for Arabic motifs you can copy at home
These five motifs progress from simplest to most complex. Each one builds on skills from the previous, so working through them in order gives you a short practice plan. Beginner-focused guides consistently recommend starting with large shapes first, then adding detail, which is exactly how these tutorials are structured.
Materials for all five tutorials:
One henna cone (handmade or ready-to-use)
Fine-tip applicator (1mm tip for detail work)
Painter’s tape or medical tape (to mask edges)
Lemon-sugar sealant (1 tsp lemon juice + 1 tsp sugar, mixed)
Cotton balls and a small bowl of water for cleanup
Tutorial 1: Single vine trail
Draw a gentle S-curve from your wrist toward your middle finger using light pressure.
Add three small oval leaves branching alternately left and right along the curve.
Place a small teardrop at the tip of each leaf.
Add a dot at each branch point where the leaf meets the vine.
Let dry 20 minutes, then seal with lemon-sugar.
Pro Tip: Keep your wrist relaxed and move your whole arm, not just your fingers. Finger-only movement creates shaky lines.
Tutorial 2: Bold rose cluster
Draw a tight spiral at the center of the back of your hand — this is the rose core.
Add five rounded petals curving outward from the spiral.
Draw a second ring of slightly larger petals behind the first.
Add two curved leaf shapes on either side of the rose.
Place small dots around the outer petals as filler.
Outline the entire rose with a second pass to thicken the lines.
Pro Tip: Thick outlines are what separate Arabic roses from Indian ones. Go over the outer edge twice if needed.
Tutorial 3: Finger ring chain
Choose one finger and mark the midpoint with a small dot.
Draw a thin vine circling the finger at that point, meeting itself cleanly.
Add three small teardrop shapes hanging downward from the vine.
Place a dot at the tip of each teardrop.
Repeat on adjacent fingers with slight variation (two teardrops on one, four on another).
Pro Tip: Tape the finger above and below the ring zone to keep edges clean. Peel tape immediately after drawing, before the paste dries.
Tutorial 4: Small mandala centerpiece
Draw a dot in the center of your palm.
Draw six evenly spaced petals radiating outward from the dot.
Add a second ring of six smaller petals between the first ring’s petals.
Draw a circle connecting the outer tips of the first petal ring.
Add short radial lines extending beyond the circle toward the wrist.
Fill alternate petals in the inner ring for contrast.
Seal with lemon-sugar once dry.
Pro Tip: Use a ruler or folded paper to pre-mark petal positions before drawing. Uneven spacing is the most common beginner mistake with mandalas.
Tutorial 5: Diagonal paisley
Draw a teardrop shape diagonally across the back of your hand, from the thumb base toward the pinky knuckle.
Add a curved tail extending from the pointed end of the teardrop.
Fill the interior with three concentric curved lines following the teardrop’s shape.
Add small leaf shapes along the outer edge of the paisley.
Place dots at the tip of each leaf.
Draw a short vine extending from the tail with two small buds.
Outline the entire paisley a second time for a bolder look.
Seal with lemon-sugar.
Troubleshooting shaky lines: If your lines wobble, rest your drawing hand’s pinky finger on the skin surface as an anchor. Move the cone in one continuous stroke rather than short, hesitant segments.
How to apply henna paste and get the best stain
Getting a dark, long-lasting stain is mostly about what happens after the paste goes on, not during application. Aftercare steps like lemon-sugar sealing and avoiding water make a measurable difference in stain depth.
Pre-application checklist:
Wash and dry the skin thoroughly; no lotion, oil, or sunscreen
Warm the skin slightly (a warm towel for 2 minutes works well)
Have your design reference image open and visible
Prepare lemon-sugar sealant before you start
Aftercare timeline:
Stage | What to do | Timing |
Paste on | Apply design, keep area still | — |
Dry time | Let paste air-dry until no longer tacky | 20–30 min |
Seal | Apply lemon-sugar with a cotton ball | After dry |
Leave paste on | Keep paste on skin as long as possible | 4–8 hours (overnight is ideal) |
Remove paste | Scrape off gently with a butter knife or card; no water | After paste time |
Avoid water | Keep area dry to allow oxidation | First 24 hours |
Color peaks | Stain darkens from orange to deep brown/burgundy | 24–48 hours after removal |
Aftercare steps for a darker stain:
After removing paste, rub a small amount of coconut or olive oil on the design (no water)
Wrap the design loosely in medical tape or plastic wrap overnight to trap body heat
Avoid swimming, long showers, or soaking the area for the first 24 hours
Skip exfoliating scrubs on the design area until you’re ready for the stain to fade
Moisturize daily with oil (not water-based lotion) to extend stain life
Pro Tip: Body heat accelerates dye release. Sitting near a warm (not hot) heat source, like a lamp or a warm room, for 30 minutes after sealing noticeably deepens the final stain.
Natural henna vs. “black henna”: what you need to know before applying
Natural henna paste is made from Lawsonia inermis, a plant whose dried and powdered leaves produce an orange-to-brown stain. That’s it. Any product marketed as “black henna” is not natural henna. It typically contains para-phenylenediamine (PPD), a chemical dye used in hair color products, which can cause severe skin reactions.
The FDA has flagged PPD-containing temporary tattoo products as a safety concern. Reactions range from mild redness and itching to blistering, scarring, and sensitization that can make future exposure to PPD (in hair dye, for example) dangerous.
Signs of a PPD reaction:
Redness, swelling, or blistering at the application site
Intense itching or burning within 24–48 hours
Raised welts that follow the design outline exactly
Symptoms that worsen rather than fade after 48 hours
How to check what you’re buying:
Natural henna paste is green-brown or dark brown in color, never black
Ingredient list should show Lawsonia inermis (henna) as the primary ingredient
Avoid products with “PPD,” “p-phenylenediamine,” or unlisted “natural black” claims
Metallic salts (silver nitrate, lead acetate) in some older formulas can also cause reactions
Patch-test protocol (do this 24–48 hours before full application):
Apply a small amount of henna paste (pea-sized) to the inner forearm or behind the ear.
Leave it on for the same duration you plan to use for the full design.
Remove and keep the area dry for 24 hours.
Check for redness, itching, swelling, or blistering.
If any reaction appears, do not proceed with full application and consult a dermatologist.
If no reaction appears after 48 hours, the product is likely safe for you to use.
Even with natural henna, some individuals have sensitivities. A patch test is always worth the 48-hour wait.
This is general safety information, not medical advice. If you experience a skin reaction, contact a healthcare provider or call Poison Control at 1-800-222-1222.
DIY options: cones, kits, and stencils
The product type you choose affects line quality, stain depth, and how much control you have over the design.
Product types and trade-offs:
Handmade henna cones: Best line control and stain quality. Made with fresh paste, so they have a shorter shelf life (refrigerate and use within a few weeks). Ideal for anyone serious about clean Arabic lines. Hennaforfun’s handmade henna cones are a reliable option for this.
Ready-to-use kits: Convenient for beginners. Usually include a cone, applicator tips, and basic instructions. Quality varies; check that the kit uses natural Lawsonia inermis paste. Hennaforfun’s DIY henna kit includes everything needed to start.
Stencils: Fast and beginner-friendly for simple shapes. The limitation is that Arabic designs depend on flowing, organic lines that stencils can’t fully replicate. Use a DIY henna stencil for the central motif, then add freehand vines and leaves around it to keep the design looking authentic rather than stamped.
When stencils work and when they don’t:
Stencils are genuinely useful for mandalas and geometric centerpieces where symmetry matters. They struggle with diagonal vine trails and organic floral clusters, which are the core of most Arabic styles. The best approach is to use a stencil for one anchor motif and build the rest freehand.
Pro Tip: If you’re using a stencil, press it firmly against the skin and hold it still while applying paste. Any movement creates bleed under the edges, which is harder to fix than a freehand wobble.
When to book a lesson instead: If you’ve tried DIY twice and the lines still aren’t where you want them, a single private lesson will advance your skill faster than another solo practice session. Hennaforfun offers private henna lessons in the Kirkland, Bellevue, and Snohomish area.
Why the “more coverage = better” assumption misses the point
There’s a persistent idea in henna circles that a more elaborate, denser design is always the more impressive one. Bridal clients sometimes arrive with reference images of full-arm coverage and assume that’s the standard to aim for. It isn’t, and pushing toward maximum coverage without the skill or time to execute it cleanly usually produces the opposite of what anyone wanted.
The most striking Arabic henna designs I’ve seen at Hennaforfun events are often the ones with the most restraint. A single bold Khaleeji rose on the back of the hand, outlined twice for weight, with three leaf accents and nothing else, photographs better than a crowded half-hand design where the motifs compete for attention. Negative space is doing real compositional work in Arabic mehndi, not just filling time between motifs.
The same logic applies to choosing between DIY and professional work. The question isn’t whether you can do it yourself; it’s whether the occasion warrants the precision a professional brings. For a casual Whenna event or a practice session at home, DIY is exactly right. For a bridal shoot or a pregnancy henna session where the photos will be kept for years, the investment in a professional artist pays for itself in the first image.
What I’d encourage anyone browsing this gallery to do is pick one motif, not one style category, and practice it until the lines are clean. A single well-executed rose is a better foundation than five mediocre attempts at different styles. That’s the progression that actually builds skill.
Hennaforfun brings Arabic henna to your event or your doorstep
Hiring a professional henna artist and buying a DIY kit are both good options, depending on what you need. For events where the design needs to be consistent across multiple guests, or where the occasion will be photographed, a professional artist removes the guesswork entirely.
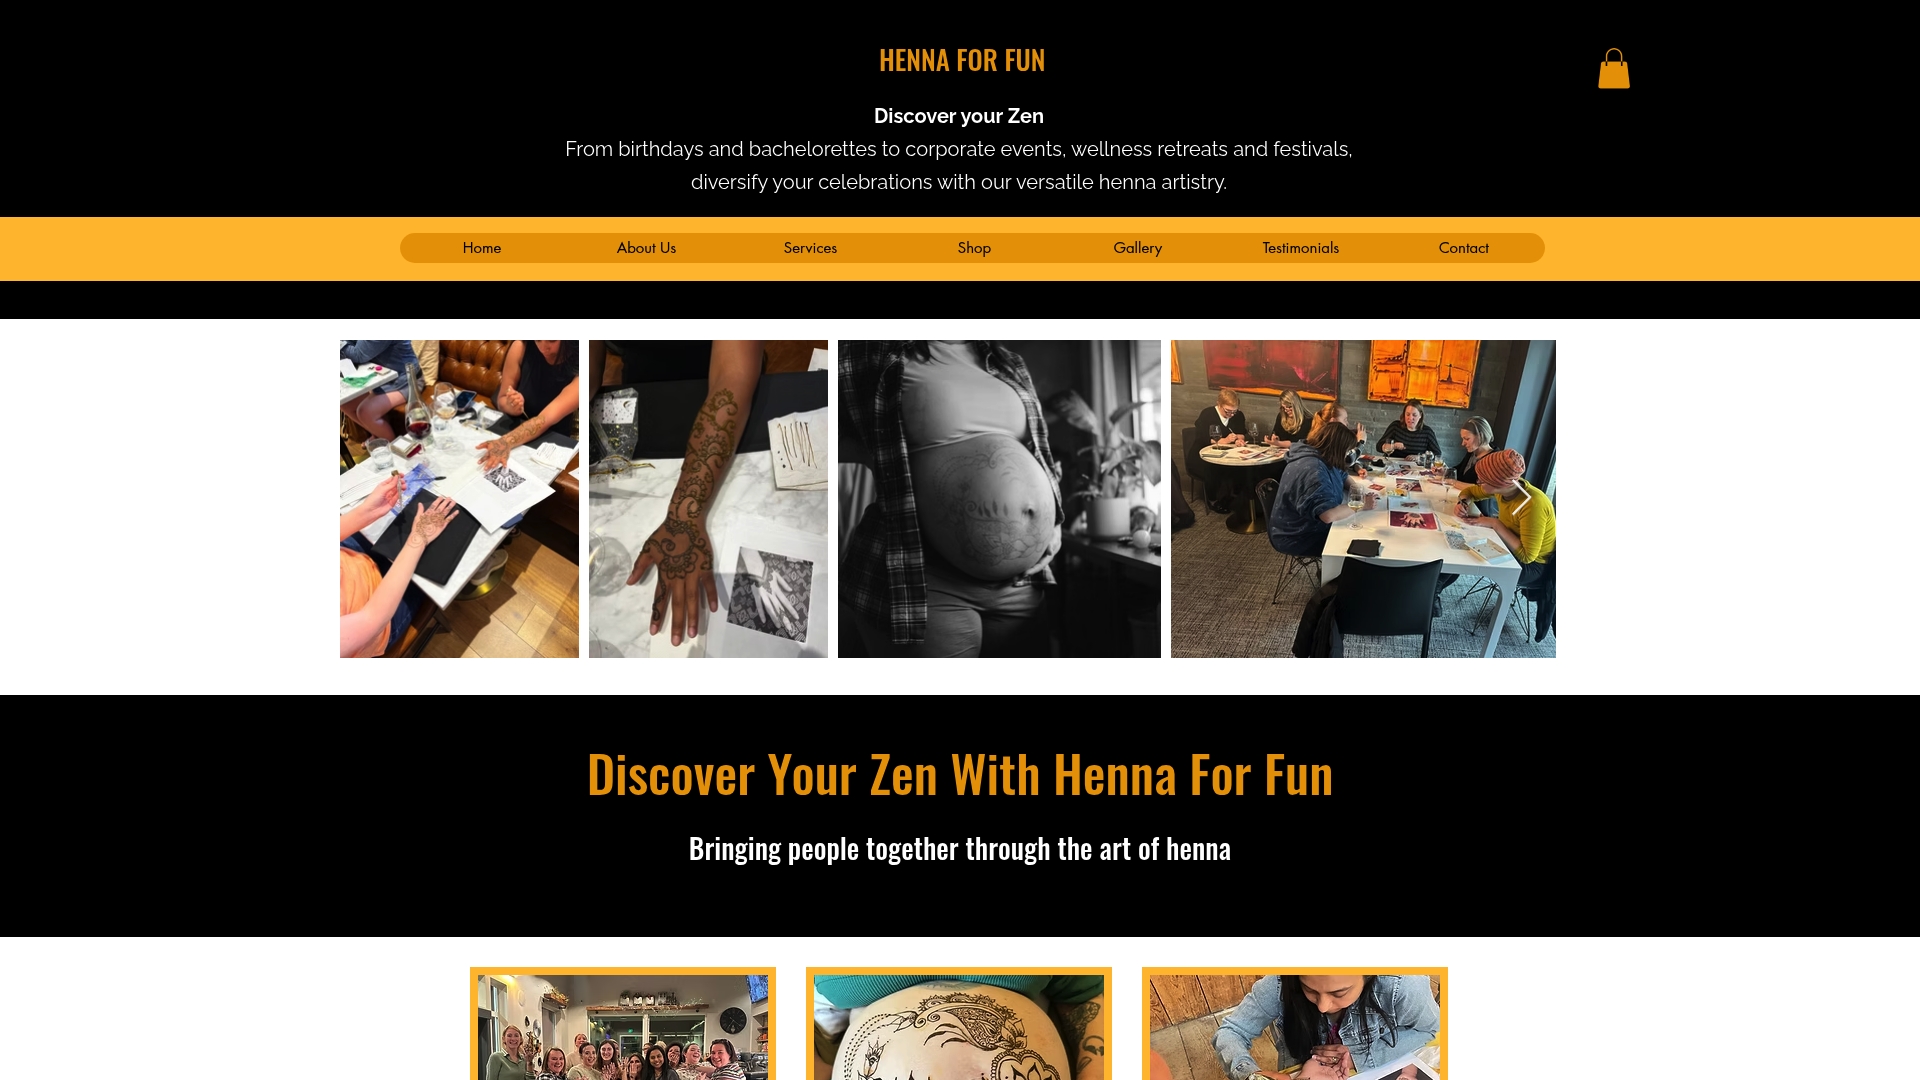
Hennaforfun provides henna artists for parties, corporate workshops, and Whenna Events at wineries, homes, and private venues. For expectant parents, the pregnancy henna service creates personalized belly designs for maternity shoots and baby showers. If you’d rather build the skill yourself, private henna lessons in the Kirkland, Bellevue, and Snohomish area teach Arabic motifs from the ground up, with hands-on feedback that no tutorial video can replicate. DIY supplies, including handmade cones, kits, and stencils, are available through the Hennaforfun shop.
Check upcoming events and availability or browse the full services menu to find the right fit for your occasion.
Useful sources and further reading
The sources below were used throughout this article. They’re worth bookmarking if you want to go deeper on specific styles or aftercare.
Resource | What it covers |
Visual traits, aftercare tips, lemon-sugar seal | |
Step-by-step beginner guide and practice plan | |
Regional styles and occasion matching | |
Mapping technique, shading, professional artist tips | |
Large curated visual inspiration board | |
High-volume pinned collection by motif and style | |
Complete aftercare and stain optimization guide |
Recommended
Comments